Organising my exhibition
- Poul van den Elshout
- May 9, 2019
- 3 min read

Updated: Jul 11, 2019
Picking the collection was hard, never thought it was that hard. Filtered down my selection to about 100 pictures to find out that doesn't fit in the gallery off course. How much space can I use, what formats should the pictures be? First measuring the place and put it on paper, print out my selection to scale and shuffle and make another pre selection, down to 40. 10 To go, that is frustrating, leaving all those great pictures out but I can't have it all, it just doesn't fit.
I'd set the format to 80cm x 120cm but still didn't choose the medium. A year ago I visited an exhibition in Rotterdam and saw a very sleek system where the photo seem to float 4cm from the wall. Luckily I noted down the name of the producer and ordered my first photo to check the quality of the file, print and mechanism.
Scanning the negatives on high resolution took a while, the highest resolution was about 72MP (6.960px x 10.344px) and had to be digitally retouched. The files were huge in file size and format. Retouching digitally is quit different than manually but equally fun.
The first print was perfect the first time. I was amazed by the quality and overall look of the mechanism. Now that I know what system to use I could go ahead and design the exposition layout.

Making choices for layout of the exposition gave me a better understanding of what would fit together, the logic and the story as you would walk around the rooms. Combining the photo's and telling the story gave me more clarity. The final selection had to be made, I was down to 29. These were the ones I had to scan, retouch and order. These were also the ones I had to give names.
The idea for the information display had been in my head for a while. I wanted to show these photo's were analogue photo's so what better way to do that by showing the negative along side the photo. The names I gave the photo's were short, less than 6 letters. The information about location, camera and the film used had to be on there as well. The designs were made and printed on thick foam. Posters to announce the opening were ordered and I ordered a huge Di-bond print (145cm x 210cm) to hang outside the gallery to attract people.

Because I was emphasising that these were analogue photo's I decided to display my camera's as well. But they needed to be displayed safely so 2 big bell jars were found. Both my most used camera's, together with some Ilford and Kodak film, could fit into these jars without people being able to touch them.
It was time to invite friends, family, colleagues and art lovers for the opening on June 29th. Mailings, instagram and FaceBook were used to notify people, the poster were hung all around the area.
Bit by bit the photo's arrived at my home. They were all closely checked, just 2 of them needed to be re-printed. A week before the opening all my stuff was brought to the gallery to build the exhibition. My plan was ready and well prepared. We knew what to do.


To finally see all the photo's hang gives you a feeling of pride. They were beautiful. The atmosphere was extremely calming. After hanging the photo's the display cards needed to find their place. First we hang them to close the the photo but this was not complimenting the photo so we moved them to the sides.


June 29th, time for the opening. People started entering the gallery and we offered them some drinks. at around 19:30 there were almost 45 visitors and we opened the exhibition with champagne. I gave a tours along the photo's and told stories on how the pictures were made and why I use analogue photography in the first place.
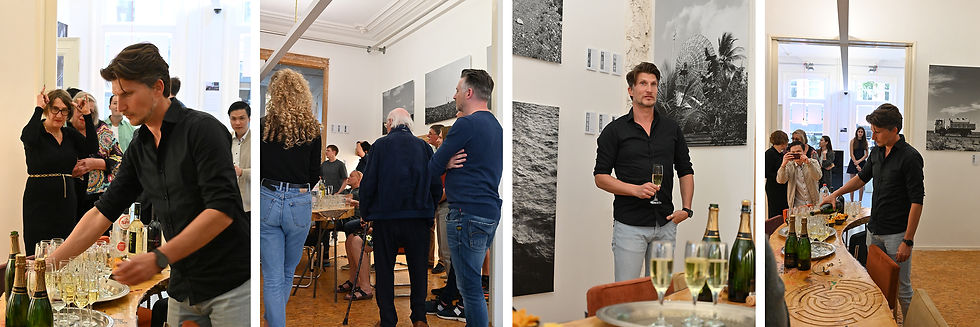
It was a great opening, lots of family and friends visited and telling the stories behind the pictures was wonderful. It's nice to hear people enjoy your work and you inspire people to pick up analogue photography again.
Let the exhibition begin!
Comments